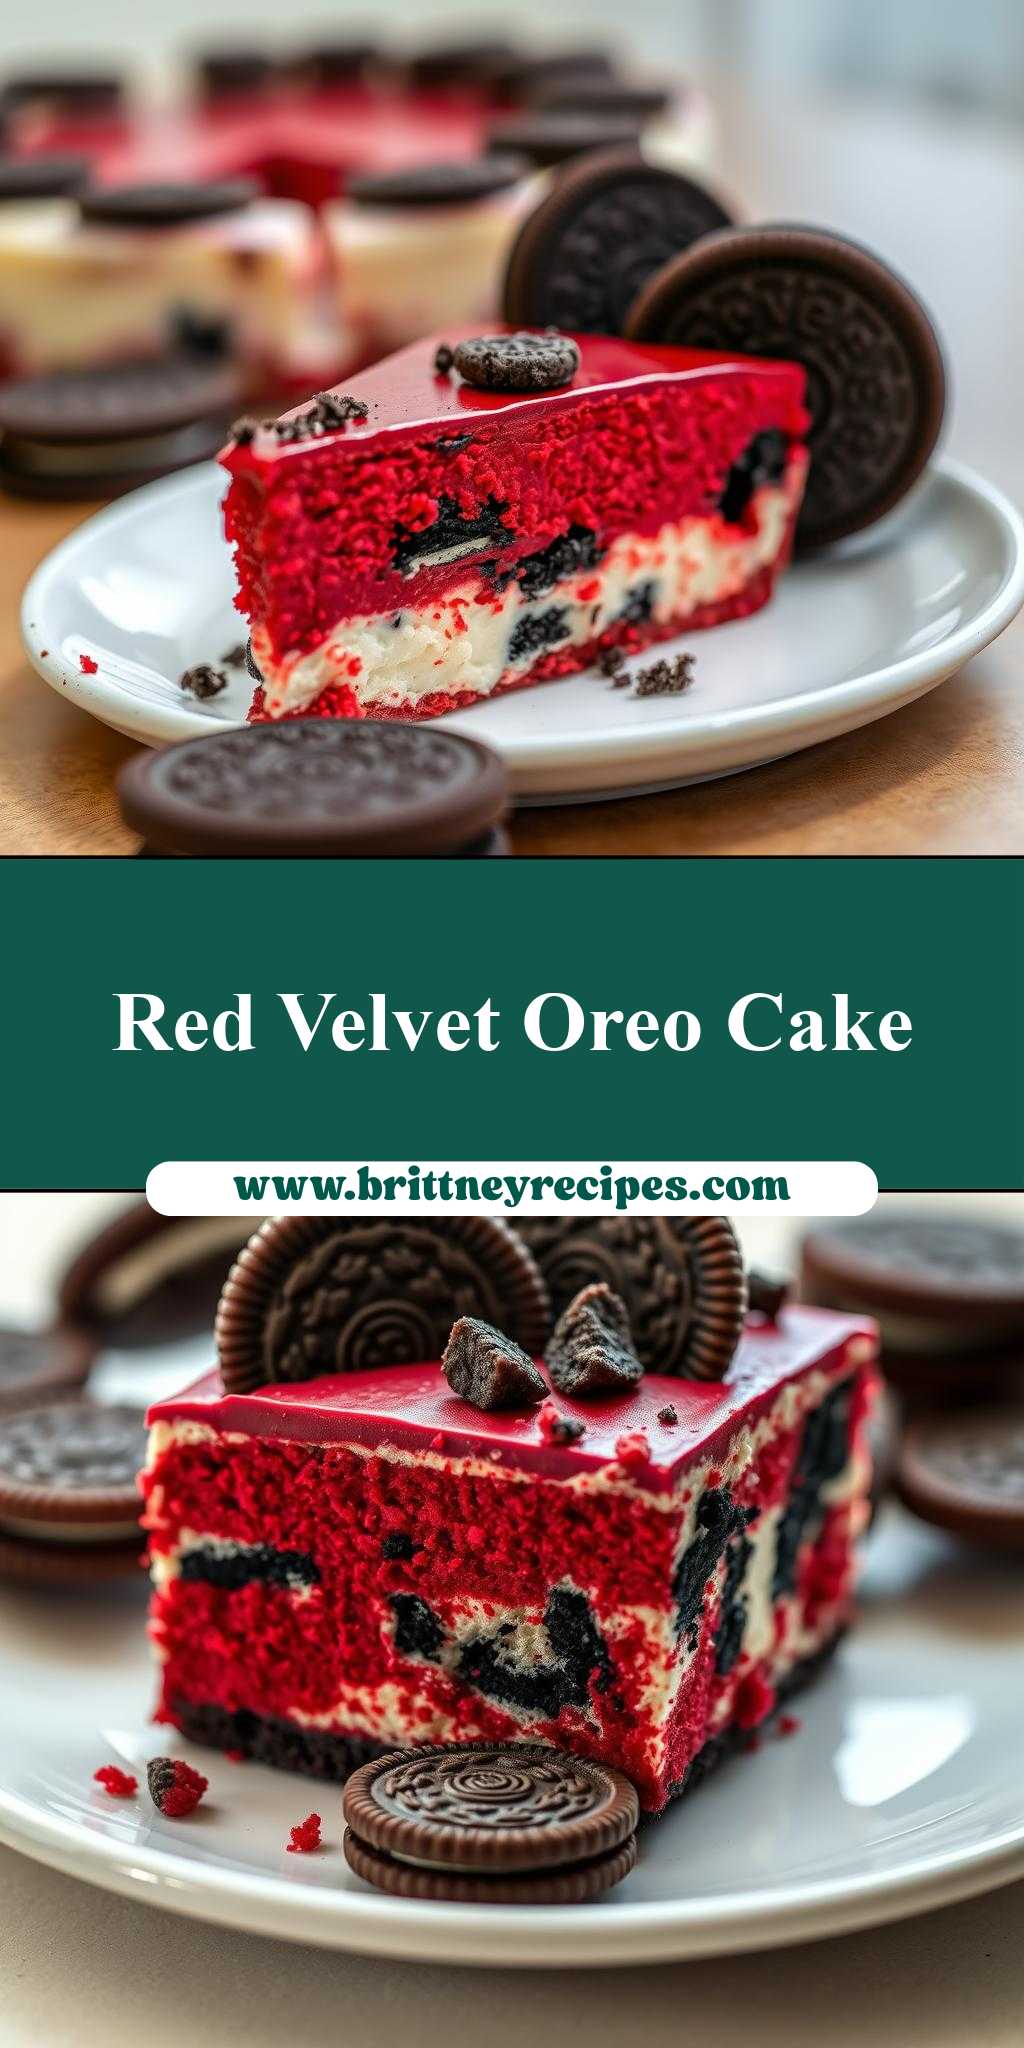
What makes a red velvet cheesecake cake truly unforgettable? The addition of Oreo cookies, of course. This easy homemade dessert combines the richness of cheesecake with the moisture of cake, all in one quick and delicious package. Featuring a velvety red velvet flavor and a crunchy Oreo crust, this family favorite is perfect for weeknight treats. Save this idea for your next baking adventure and indulge in a slice soon.
red velvet cheesecake cake with oreo cookies
Introduction
Imagine a moist red velvet cake, layered with a creamy cheesecake, and topped with the crunch of Oreo cookies. This show-stopping dessert is not only a feast for the eyes, but it’s also surprisingly easy to make. With everyday ingredients and a bit of creativity, you can create a masterpiece that will impress your family and friends. The combination of flavors and textures is truly unique, making it a perfect centerpiece for any special occasion or gathering. In this article, we’ll guide you through the process of making this stunning red velvet cheesecake cake with Oreo cookies, and provide you with helpful tips and tricks to ensure your success.
Why This Works
- Flavor balance and ingredient accessibility: The red velvet cake provides a subtle cocoa flavor, while the cheesecake adds a rich and creamy element. The Oreo cookies add a nice crunch and a touch of sweetness, balancing out the flavors. All the ingredients are easily accessible in most supermarkets, making it convenient to make.
- Ease of preparation: Despite its impressive appearance, this dessert is relatively easy to prepare. The cake and cheesecake can be made ahead of time, and the assembly is straightforward.
- Impressive results with minimal effort: The end result is a stunning dessert that looks like it was made by a professional. The layered effect and the Oreo cookie topping make it a real showstopper, and the flavors and textures will impress anyone who tries it.
Key Ingredients
The main ingredients for this dessert include: red velvet cake mix, cream cheese, eggs, sour cream, Oreo cookies, and heavy cream. You’ll also need some basic pantry staples like flour, sugar, and cocoa powder. If you want to make the cake from scratch, you can substitute the cake mix with flour, sugar, cocoa powder, and butter. For the cheesecake, you can use a store-bought cream cheese or make your own by mixing together cream cheese, sour cream, and eggs.
Instructions
- Step 1: Begin by preheating your oven to 350°F (180°C). Prepare the cake mix according to the instructions on the box, and pour it into a greased and floured cake pan. Bake for 30-35 minutes, or until a toothpick inserted into the center comes out clean.
- Step 2: While the cake is baking, prepare the cheesecake. Beat together the cream cheese, eggs, and sour cream until smooth. Add the sugar and vanilla extract, and mix until well combined. Pour the cheesecake mixture into a separate cake pan, and bake for 25-30 minutes, or until the edges are set and the center is slightly jiggly.
- Step 3: Allow the cake and cheesecake to cool completely. Once cooled, use a serrated knife to level the cake and cheesecake, if necessary. Place the cake on a serving plate, and spread a layer of cheesecake on top. Repeat this process until you have three layers of cake and two layers of cheesecake.
- Step 4: To finish the dessert, crush the Oreo cookies in a food processor or place them in a plastic bag and crush them with a rolling pin. Sprinkle the crushed cookies over the top of the cheesecake, and drizzle with heavy cream. Refrigerate the dessert for at least 30 minutes to allow the flavors to meld together.
Handy Tips
- Make sure to not overmix the cake and cheesecake batter, as this can result in a dense dessert. Stop mixing as soon as the ingredients are combined.
- Use a high-quality cream cheese for the best flavor and texture. Softened cream cheese is essential for a smooth cheesecake.
- Don’t overbake the cake and cheesecake. A toothpick inserted into the center should come out clean, but the dessert should still be slightly tender in the center.
Heat Control
When baking the cake and cheesecake, it’s essential to keep an eye on the temperature and timing. The ideal temperature for baking is 350°F (180°C), and the timing will depend on the size of your cake pans. A general rule of thumb is to bake the cake for 30-35 minutes, and the cheesecake for 25-30 minutes. Keep an eye on the dessert while it’s baking, and check for doneness by inserting a toothpick into the center. If the toothpick comes out clean, the dessert is done.
Crunch Factor
The crunch factor in this dessert comes from the Oreo cookies. To achieve the perfect crunch, make sure to crush the cookies just before sprinkling them over the top of the cheesecake. You can also use other types of cookies or nuts to add crunch, such as chocolate sandwich cookies or chopped pecans.
Pro Kitchen Tricks
- Use a cake turntable to display your dessert. This will make it easier to serve and add a professional touch to your presentation.
- Make the cake and cheesecake ahead of time, and store them in the refrigerator until you’re ready to assemble the dessert. This will save you time and reduce stress.
- Use a pastry bag to drizzle the heavy cream over the top of the dessert. This will give you a smooth and even drizzle, and add a professional touch to your presentation.
Storage Tips
- Store the dessert in the refrigerator for up to 3 days. Allow the dessert to come to room temperature before serving.
- Freeze the dessert for up to 2 months. Wrap the dessert tightly in plastic wrap or aluminum foil, and thaw overnight in the refrigerator before serving.
- Use an airtight container to store the dessert. This will keep the dessert fresh and prevent it from absorbing odors from other foods in the refrigerator.
Gift Packaging Ideas
This dessert is perfect for gift-giving, especially during the holiday season. Consider packaging the dessert in a decorative tin or cake box, and topping it with a ribbon or gift tag. You can also add a personalized note or card to make the gift even more special. If you’re shipping the dessert, make sure to use a sturdy box and plenty of packing materials to prevent damage during transit.
Flavor Variations
- Different spices: Consider adding a pinch of cinnamon or nutmeg to the cake and cheesecake for a unique flavor twist.
- Creative toppings: Try using different types of cookies or nuts to add crunch to the dessert. You can also use fresh fruit, such as strawberries or blueberries, to add natural sweetness and flavor.
- Ingredient swaps: Substitute the cream cheese with mascarpone or ricotta cheese for a different flavor and texture. You can also use different types of milk, such as almond or soy milk, to make the dessert dairy-free.
Troubleshooting
- Texture problems: If the cake or cheesecake is too dense, it may be due to overmixing. Try reducing the mixing time, or adding a little more liquid to the batter.
- Ingredient replacements: If you don’t have a particular ingredient, try substituting it with something similar. For example, you can use sour cream instead of heavy cream, or melted butter instead of oil.
- Over/undercooking signs: Keep an eye on the dessert while it’s baking, and check for doneness by inserting a toothpick into the center. If the toothpick comes out clean, the dessert is done. If it’s not done, continue baking in 5-minute increments until it’s cooked through.
FAQs
- Can I freeze it? Yes, you can freeze the dessert for up to 2 months. Wrap the dessert tightly in plastic wrap or aluminum foil, and thaw overnight in the refrigerator before serving.
- Is it gluten-free? No, this dessert contains gluten due to the presence of wheat flour in the cake mix. However, you can make a gluten-free version by substituting the cake mix with a gluten-free flour blend.
- Can I double the recipe? Yes, you can double the recipe to make a larger dessert. Just keep in mind that you’ll need to adjust the baking time accordingly, and make sure to use a larger cake pan to accommodate the increased batter.
Conclusion
In conclusion, this red velvet cheesecake cake with Oreo cookies is a show-stopping dessert that’s perfect for any special occasion. With its unique combination of flavors and textures, it’s sure to impress your family and friends. By following the instructions and tips outlined in this article, you’ll be able to create a stunning dessert that’s both delicious and visually appealing. So go ahead, get creative, and have fun making this amazing dessert!