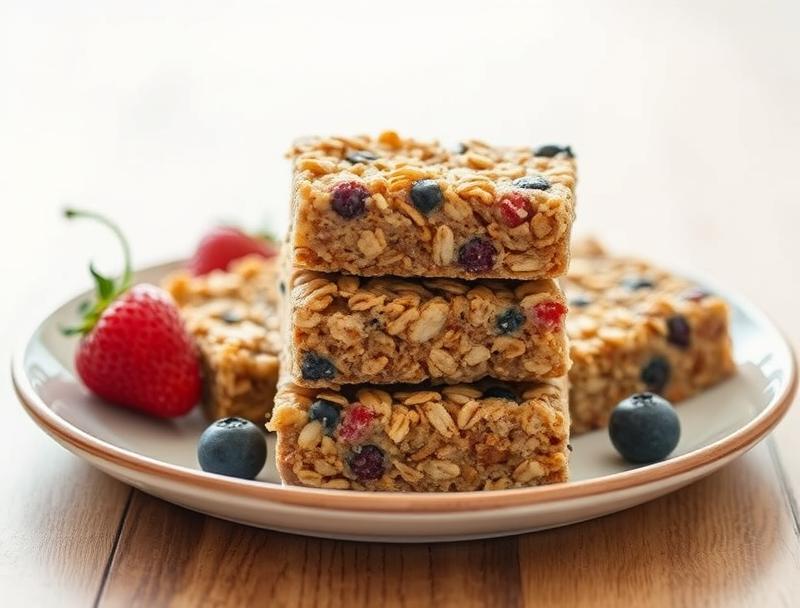
Granola Bars
Introduction
Making granola bars from scratch is a simple and rewarding process that allows for endless creativity and customization. With just a few everyday ingredients, you can create delicious, chewy, and crunchy granola bars that are perfect for snacking on the go. The best part? You can tailor the recipe to your taste preferences, adding your favorite nuts, seeds, and dried fruits to create a unique flavor combination. In this article, we’ll guide you through the process of making homemade granola bars, from preparation to storage, and provide you with helpful tips and variations to make the recipe your own.
Why This Works
- The combination of rolled oats, nuts, and seeds provides a perfect balance of texture and flavor, while the honey and brown sugar add natural sweetness without refined sugars.
- The recipe is incredibly easy to prepare, requiring just a few minutes of mixing and pressing the ingredients into a pan.
- The result is a delicious and healthy snack that’s perfect for breakfast on-the-go, lunchboxes, or as a post-workout treat, with impressive results that will make you wonder why you ever bought store-bought granola bars.
Ingredients
- 2 cups rolled oats
- 1 cup mixed nuts (such as almonds, cashews, and walnuts)
- 1/2 cup seeds (such as sunflower seeds and pumpkin seeds)
- 1/2 cup dried fruit (such as cranberries, raisins, and cherries)
- 1/4 cup honey
- 2 tablespoons brown sugar
- 1/4 cup vegetable oil
- 1 teaspoon vanilla extract
- Pinch of salt
Instructions
- Step 1: In a large mixing bowl, combine the oats, nuts, seeds, and dried fruit. Stir until well combined.
- Step 2: In a small saucepan, heat the honey, brown sugar, and vegetable oil over low heat, stirring until the sugar has dissolved.
- Step 3: Pour the wet ingredients over the dry ingredients and stir until everything is well combined.
- Step 4: Press the mixture into a lined or greased 8×8 inch baking pan. Let it cool and harden for at least 30 minutes before cutting into bars.
Handy Tips
- To ensure the granola bars hold together, don’t overmix the ingredients, and make sure to press the mixture firmly into the pan.
- Customize the recipe by adding your favorite ingredients, such as chocolate chips, coconut flakes, or cinnamon.
- If you find the granola bars too crumbly, try adding a little more honey or brown sugar to help bind the ingredients together.
Heat Control
When heating the honey and sugar mixture, be careful not to let it boil or burn, as this can affect the texture and flavor of the granola bars. Keep the heat low and stir constantly until the sugar has dissolved.
Crunch Factor
The crunch factor in granola bars comes from the nuts and seeds. To achieve the perfect crunch, make sure to chop the nuts and seeds coarsely before adding them to the mixture. You can also try adding some crunchy ingredients like peanut butter chips or candy pieces to give the granola bars an extra texture boost.
Pro Kitchen Tricks
- To make the granola bars more chewy, try adding a little more honey or brown sugar to the mixture.
- For a crunchier granola bar, bake the mixture in a preheated oven at 325°F (165°C) for 20-25 minutes, or until lightly golden brown.
- Experiment with different spices and flavorings, such as cinnamon, nutmeg, or vanilla extract, to give the granola bars a unique taste.
Storage Tips
- Store the granola bars in an airtight container at room temperature for up to 5 days.
- Wrap individual granola bars in plastic wrap or aluminum foil and freeze for up to 2 months.
- Reheat frozen granola bars by leaving them at room temperature for a few hours or by microwaving for 10-15 seconds.
Gift Packaging Ideas
Granola bars make a great gift for friends and family, especially when packaged in a cute and creative way. Try wrapping individual granola bars in colorful paper or fabric, or placing them in a decorative tin or jar. You can also add a personalized note or label to make the gift even more special.
Flavor Variations
- Try adding different types of nuts or seeds, such as pecans, hazelnuts, or pumpkin seeds, to create a unique flavor combination.
- Experiment with various spices and flavorings, such as cinnamon, nutmeg, or vanilla extract, to give the granola bars a distinct taste.
- Add some dried fruit, such as cranberries, raisins, or cherries, to give the granola bars a sweet and fruity flavor.
Troubleshooting
- If the granola bars are too crumbly, try adding a little more honey or brown sugar to help bind the ingredients together.
- If the granola bars are too hard, try baking them for a shorter amount of time or adding a little more oil to the mixture.
- If the granola bars are too soft, try baking them for a longer amount of time or adding a little more oats to the mixture.
FAQs
- Can I freeze the granola bars? Yes, you can freeze the granola bars for up to 2 months. Simply wrap individual granola bars in plastic wrap or aluminum foil and place them in a freezer-safe bag or container.
- Are the granola bars gluten-free? Yes, the granola bars are gluten-free, making them a great option for those with gluten intolerance or sensitivity.
- Can I double the recipe? Yes, you can double the recipe to make a larger batch of granola bars. Simply multiply all the ingredients by two and follow the same instructions.
Conclusion
Making homemade granola bars is a fun and rewarding process that allows you to create a delicious and healthy snack that’s tailored to your taste preferences. With these simple instructions and helpful tips, you’ll be able to make perfect granola bars every time. So go ahead, get creative, and enjoy the process of making your own homemade granola bars!