What makes the perfect comfort food snack? For me, it’s all about easy garlic cheese bombs, loaded with melted mozzarella and baked to a golden brown. This quick and easy homemade treat is a weeknight dinner winner, thanks to simple ingredients like buttery garlic and soft dough. Save this idea for your next family favorite recipe to try soon.
Easy Garlic Cheese Bombs
Introduction
Imagine a dish that’s as easy to make as it is delicious, using everyday ingredients to create a flavor explosion that will leave everyone wanting more. Welcome to the world of Easy Garlic Cheese Bombs, a recipe that combines the creaminess of cheese, the pungency of garlic, and the simplicity of preparation to create a culinary masterpiece. Whether you’re a seasoned chef or a beginner in the kitchen, this recipe is perfect for anyone looking to impress with minimal effort. The best part? It’s incredibly versatile, allowing you to experiment with different flavors and ingredients to make it your own.
Why This Works
- Flavor balance and ingredient accessibility: The combination of garlic, cheese, and dough creates a perfect harmony of flavors that is both familiar and exciting. Plus, the ingredients are easily found in most supermarkets, making it accessible to everyone.
- Ease of preparation: Despite the impressive results, the preparation is surprisingly simple. With just a few steps, you can have these cheese bombs ready to bake.
- Impressive results with minimal effort: The presentation of these garlic cheese bombs is as appealing as their taste, making them perfect for parties, gatherings, or even a quick snack. The effort-to-impress ratio is incredibly high, ensuring you’ll be the star of any culinary event.
Key Ingredients
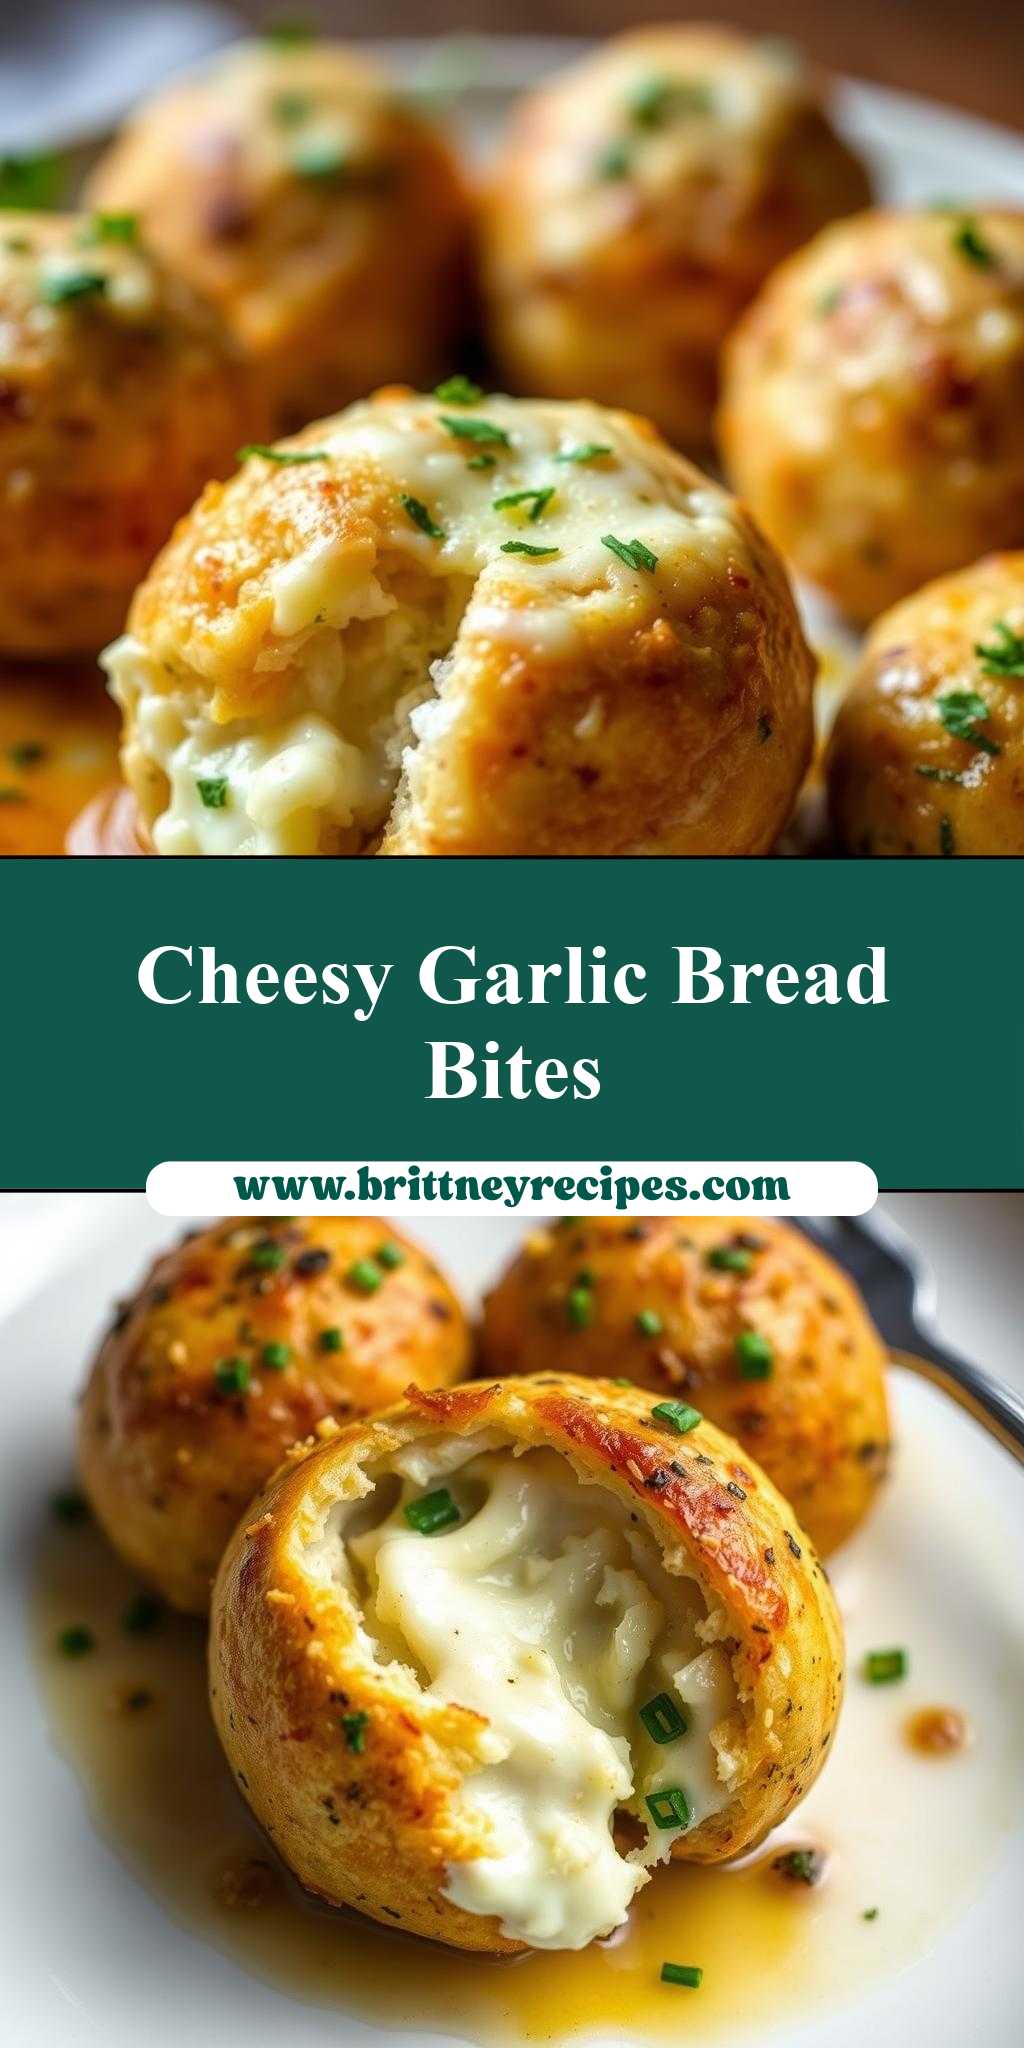
The main ingredients for Easy Garlic Cheese Bombs include buttery dough (which can be homemade or store-bought, depending on your preference), a blend of cheeses for the ultimate cheesy experience, garlic for that unmistakable flavor, and some chopped herbs for freshness. For the dough, you can use a simple pizza dough or even croissant dough for a flakier version. The cheese blend can include mozzarella, parmesan, and ricotta for a creamy and well-balanced flavor. Garlic, of course, is the star of the show, and you can adjust the amount to your taste. Finally, some chopped parsley or basil add a bright, freshness that complements the richness of the cheese and dough.
Instructions
- Step 1: Begin by preheating your oven to 375°F (190°C). While that’s warming up, roll out your dough to a thickness that’s easy to work with but not too thin. You’re aiming for a balance between crunch on the outside and softness on the inside.
- Step 2: In a bowl, mix your cheese blend with minced garlic and chopped herbs until well combined. The amount of garlic is up to you, but remember, it’s easier to add more than it is to take it away, so start with a small amount and taste as you go.
- Step 3: Cut out circles of dough. You can use a cookie cutter or the rim of a glass for this. Place a spoonful of your garlic cheese mixture in the center of each dough circle. Fold the dough over the filling to form a ball or a bomb shape, sealing the edges tightly to prevent the cheese from escaping during baking.
- Step 4: Place your cheese bombs on a baking sheet lined with parchment paper, leaving some space between each to allow for even cooking. Brush the tops with a little bit of olive oil or beaten egg for a golden glaze. Bake for about 15-20 minutes, or until golden brown. Serve warm and enjoy!
Handy Tips
- One of the best things about this recipe is its flexibility. Don’t be afraid to experiment with different types of cheese or add some diced meats (like ham or bacon) to the cheese mixture for added flavor.
- For an extra crispy crust, you can brush the cheese bombs with a little bit of water and then sprinkle some grated parmesan cheese on top before baking.
- Keep an eye on your cheese bombs while they’re baking, as the cooking time can vary depending on the size of your bombs and your oven’s temperature accuracy.
Heat Control
Heat control is crucial when baking your garlic cheese bombs. The ideal temperature is 375°F (190°C), and you’re looking for a golden brown color on the outside, which should take about 15-20 minutes. It’s essential to keep an eye on them to prevent overcooking, which can lead to a dry, hard exterior. If you notice they’re browning too quickly, you can cover the baking sheet with foil to prevent further browning.
Crunch Factor
The crunch factor in these cheese bombs comes from the outside layer of the dough, which should be crispy and golden. To achieve this, make sure your oven is at the right temperature, and don’t overcrowd the baking sheet, allowing for air to circulate around each bomb. Additionally, brushing the tops with a little olive oil or egg wash before baking helps to enhance the browning and crunchiness.
Pro Kitchen Tricks
- For an extra flaky crust, try laminating your dough (folding and rolling it out multiple times) before cutting out the circles. This technique, similar to making puff pastry, creates layers in the dough that will expand during baking, giving you a beautifully textured exterior.
- Consider using a pizza stone in your oven to bake the cheese bombs. The stone absorbs moisture and distributes heat evenly, leading to a crisper crust.
- To make cleanup easier, line your baking sheet with parchment paper. This way, any cheese that melts out during baking won’t stick to the pan, making post-meal cleanup a breeze.
Storage Tips
- If you don’t plan to bake all your cheese bombs at once, you can store them in an airtight container in the fridge for up to a day or freeze them for later use. Simply place the frozen bombs on a baking sheet and bake at 375°F (190°C) for an additional 5-10 minutes, or until golden brown.
- For reheating, place the baked cheese bombs in the oven at 350°F (180°C) for about 5 minutes, or until warmed through. You can also reheat them in the microwave, but be careful not to overheat, as this can lead to a tough exterior.
- When storing leftovers, it’s best to keep them in an airtight container in the fridge and consume within a couple of days for the best flavor and texture.
Gift Packaging Ideas
If you’re looking to give these garlic cheese bombs as a gift, consider packaging them in a beautiful basket or tin, perhaps with some dipping sauces like marinara or a garlic aioli. You could also wrap them individually in parchment paper and tie with a ribbon for a more rustic, homemade look. Don’t forget to include the reheating instructions so your gift recipients can enjoy them at their best.
Flavor Variations
- Different spices: Try adding some dried oregano, basil, or red pepper flakes to the cheese mixture for an Italian twist or a spicy kick.
- Creative toppings: Before baking, you can sprinkle some grated cheese, chopped herbs, or even some diced bacon on top of the cheese bombs for extra flavor and texture.
- Ingredient swaps: Experiment with different types of cheese, such as feta for a salty, Greek-inspired flavor or goat cheese for a tangy twist. You can also add some chopped veggies like spinach or bell peppers to the cheese mixture for added nutrition and flavor.
Troubleshooting
- Texture problems: If your cheese bombs turn out too dense, it might be because the dough was overworked. Try to mix and knead the dough just until the ingredients come together, and then let it rest.
- Ingredient replacements: If you’re missing an ingredient, don’t be afraid to substitute. For example, you can use different types of cheese or add some garlic powder if you don’t have fresh garlic.
- Over/undercooking signs: Keep an eye on your cheese bombs while they’re baking. If they’re not golden brown after 15 minutes, give them a few more minutes. If they start to brown too quickly, cover the baking sheet with foil to prevent burning.
FAQs
- Can I freeze it? Yes, you can freeze the cheese bombs before baking. Simply place them on a baking sheet, freeze until solid, and then transfer them to an airtight container or freezer bag for later use.
- Is it gluten-free? Depending on the type of dough you use, these cheese bombs can be gluten-free. Look for a gluten-free dough recipe or use a pre-made gluten-free dough to accommodate dietary restrictions.
- Can I double the recipe? Absolutely! This recipe is easy to scale up or down, depending on your needs. Just keep in mind that baking time might be slightly longer if you’re making a large batch.
Conclusion
Making Easy Garlic Cheese Bombs is a journey of discovery and creativity, allowing you to experiment with flavors and ingredients in a fun and rewarding way. Whether you’re cooking for yourself or a crowd, this recipe is sure to please, offering a delicious combination of textures and tastes that will leave everyone wanting more. So don’t be afraid to get creative, share your favorite variations, and enjoy the process of making something truly special. Happy cooking!