What makes a perfect Sunday dinner? A delicious baked ham smothered in a sweet pineapple glaze, made easy with just a few homemade ingredients. This quick and easy family favorite recipe is perfect for a weeknight dinner too. Save this idea for your next special meal.
Baked Ham with Pineapple Glaze
Introduction
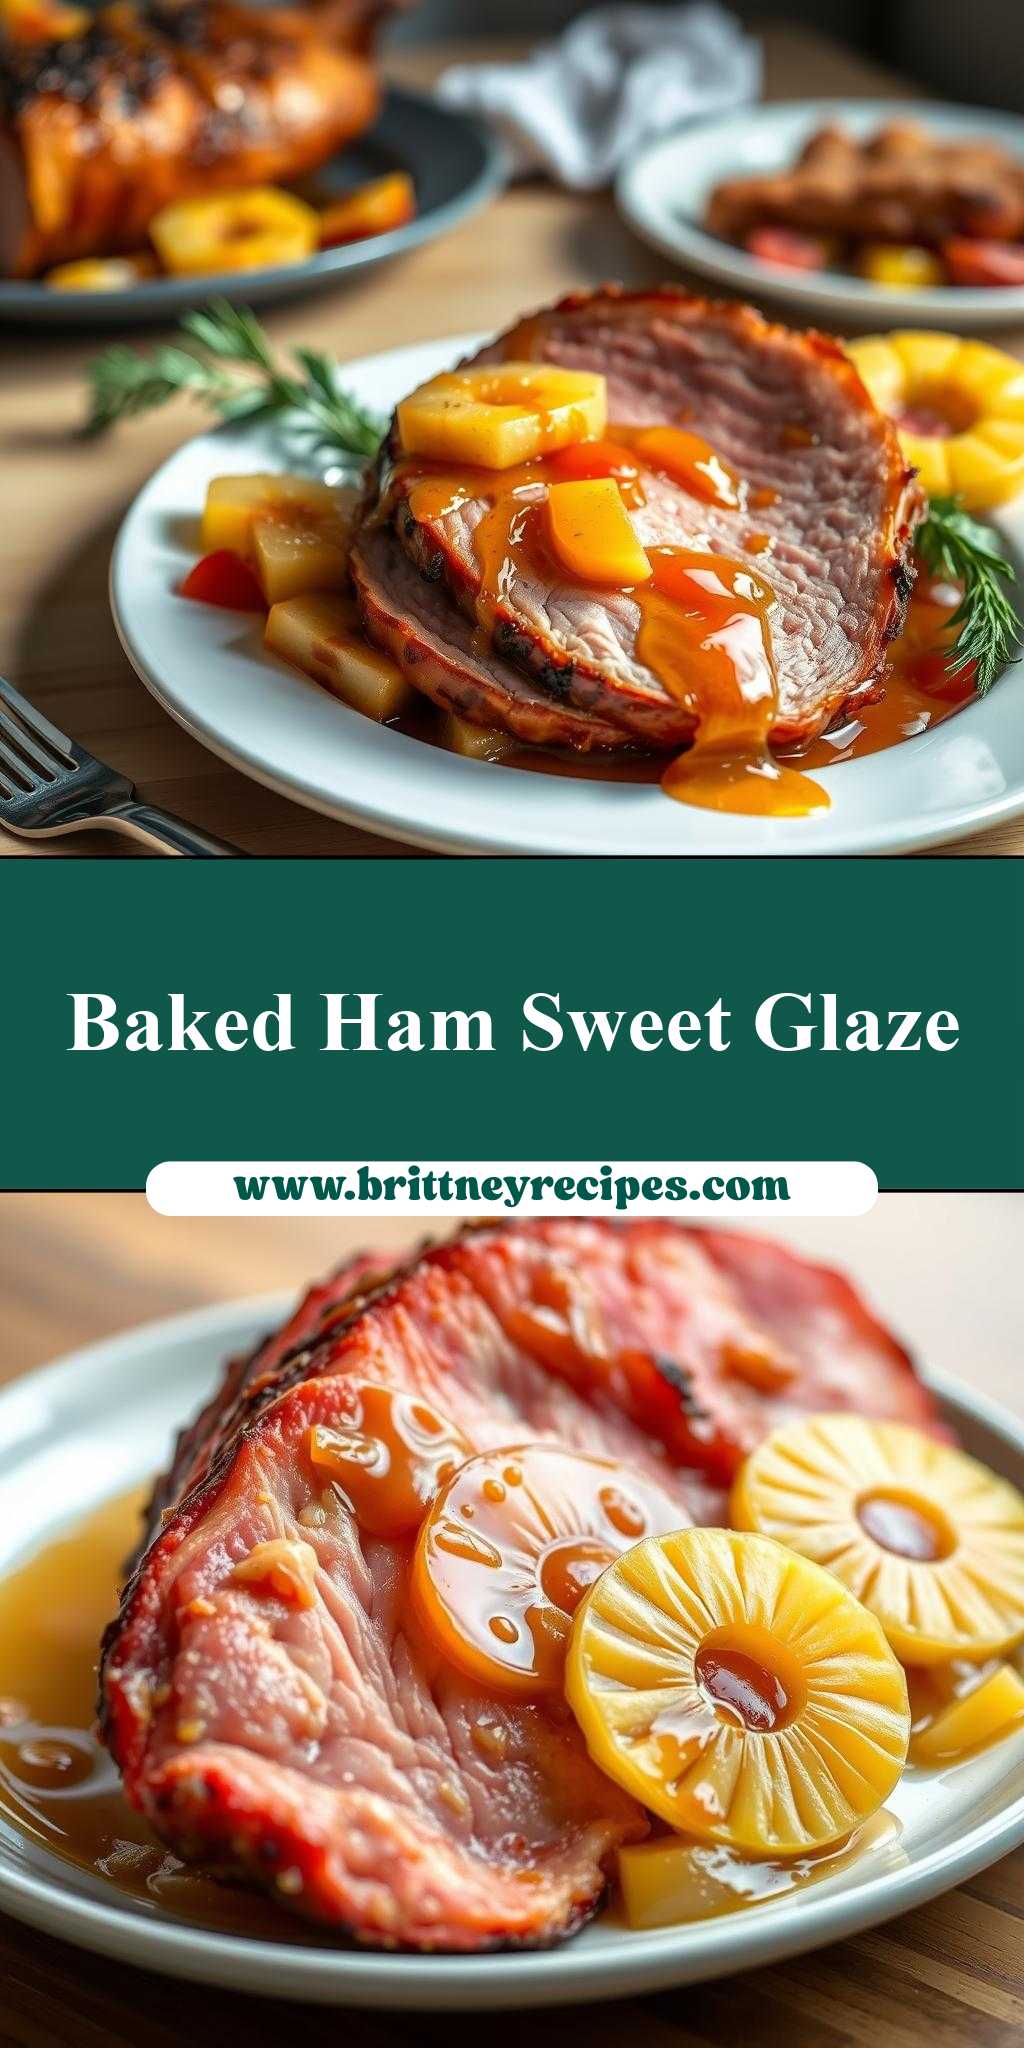
Baked ham is a classic dish that never goes out of style, and when you add a sweet and tangy pineapple glaze, it elevates the flavor to a whole new level. This recipe is perfect for special occasions, holidays, or even a cozy Sunday dinner with family. The best part? It’s incredibly easy to make, requiring just a few everyday ingredients and some basic kitchen skills. Whether you’re a seasoned cook or a beginner, this baked ham with pineapple glaze is sure to impress your guests and leave them asking for seconds.
Why This Works
- The combination of savory ham, sweet pineapple, and tangy brown sugar creates a flavor balance that’s hard to resist. Plus, the ingredients are easily accessible and won’t break the bank.
- Preparation is a breeze, and the hands-on time is minimal, making it perfect for busy home cooks who want to impress without slaving away in the kitchen.
- The end result is a beautifully glazed ham that’s sure to be the centerpiece of any meal, and the best part is that it requires minimal effort to achieve such impressive results.
Key Ingredients
The star of the show is, of course, the ham. You’ll need a bone-in ham, preferably with a nice layer of fat to keep it moist and flavorful. For the glaze, you’ll need pineapple juice, brown sugar, Dijon mustard, and spices like cinnamon and cloves. Don’t worry if you don’t have all the spices on hand – you can always substitute or omit them to taste. Other key ingredients include olive oil, garlic, and fresh pineapple rings for garnish. If you want to get fancy, you can add some chopped fresh herbs like parsley or thyme to the glaze for extra flavor.
Instructions
- Step 1: Preheat your oven to 325°F (160°C). While that’s heating up, score the fat layer on the surface of the ham in a diamond pattern, cutting about 1/4 inch deep. This will help the glaze penetrate the meat and create a beautiful, caramelized crust.
- Step 2: In a small saucepan, combine the pineapple juice, brown sugar, Dijon mustard, cinnamon, and cloves. Bring the mixture to a boil over medium heat, then reduce the heat to low and simmer for about 5 minutes, or until the glaze has thickened slightly. You can help the process by stirring occasionally and scraping the bottom of the pan to prevent burning.
- Step 3: Place the ham in a roasting pan or a large Dutch oven, and brush the glaze all over the surface, making sure to get some into the scored lines. You can also add some pineapple rings and cherry slices to the pan for added flavor and visual appeal.
- Step 4: Cover the pan with aluminum foil and bake the ham for about 20 minutes per pound, or until it reaches an internal temperature of 140°F (60°C). During the last 20 minutes of cooking, remove the foil and baste the ham with the pan juices every 10 minutes or so. This will help keep the meat moist and promote even browning.
Handy Tips
- Make sure to let the ham rest for at least 10-15 minutes before slicing and serving. This will help the juices redistribute and the meat to retain its tenderness.
- If you’re using a spiral-cut ham, you can skip the scoring step and simply brush the glaze all over the surface.
- Don’t overcrowd the pan – cook the ham in a single layer to ensure even cooking and browning.
- For a more intense flavor, you can marinate the ham in the glaze for a few hours or overnight before baking.
Heat Control
The ideal temperature for baking the ham is between 325°F (160°C) and 350°F (180°C). You want to cook the ham low and slow to prevent it from drying out, especially if it’s a larger cut. As for timing, a good rule of thumb is to cook the ham for about 20 minutes per pound, or until it reaches an internal temperature of 140°F (60°C). Use a meat thermometer to check the internal temperature, especially if you’re unsure. The ham is done when it’s nicely browned and caramelized on the outside, and the meat is tender and juicy on the inside.
Crunch Factor
The crunch factor in this recipe comes from the caramelized glaze on the surface of the ham. To achieve this, make sure to cook the ham during the last 20 minutes without the foil, and baste it with the pan juices every 10 minutes or so. You can also add some chopped nuts or seeds to the glaze for extra texture and crunch. The ham itself should be tender and juicy, with a nice balance of fat and lean meat. If you prefer a crisper exterior, you can broil the ham for an additional 2-3 minutes, watching carefully to prevent burning.
Pro Kitchen Tricks
- To prevent the glaze from burning or caramelizing too quickly, you can cover the pan with foil during the first part of the cooking time. This will help the ham cook evenly and prevent hot spots.
- For a more intense flavor, you can add some aromatics like onion, carrot, and celery to the pan with the ham. These will add a depth of flavor and aroma to the dish without overpowering the other ingredients.
- To make the recipe more substantial, you can serve the ham with some roasted vegetables like Brussels sprouts, carrots, or sweet potatoes. Simply toss the vegetables in olive oil, salt, and pepper, and roast them in the oven until tender and caramelized.
Storage Tips
- Leftover ham can be stored in the refrigerator for up to 5 days, or frozen for up to 3 months. Make sure to wrap the ham tightly in plastic wrap or aluminum foil to prevent drying out.
- To reheat the ham, simply wrap it in foil and bake it in the oven at 325°F (160°C) for about 10-15 minutes, or until warmed through.
- The glaze can be made ahead of time and stored in the refrigerator for up to a week. Simply reheat it before using, and adjust the seasoning as needed.
Gift Packaging Ideas
If you want to give the baked ham as a gift, you can package it in a decorative tin or container, along with some crusty bread, cheese, and fruit. Simply slice the ham thinly and arrange it on a platter or board, along with the other ingredients. You can also add some garnishes like fresh herbs, edible flowers, or pomegranate seeds to make the dish more visually appealing. For a more rustic presentation, you can wrap the ham in brown paper or a canvas bag, and tie it with twine or ribbon.
Flavor Variations
- For a spicy kick, you can add some diced jalapeños or red pepper flakes to the glaze.
- For a more intense flavor, you can use a mixture of pineapple juice and bourbon or rum in the glaze.
- For a smoky flavor, you can add some smoked paprika or chipotle peppers in adobo sauce to the glaze.
- For a sweeter flavor, you can use honey or maple syrup instead of brown sugar in the glaze.
Troubleshooting
- If the glaze is too thick, you can thin it out with a little more pineapple juice or water.
- If the ham is too dry, you can baste it with more pan juices or glaze during the cooking time.
- If the ham is too salty, you can balance out the flavor with a squeeze of fresh lime or lemon juice.
- If the glaze is too dark or caramelized, you can cover the pan with foil to prevent further browning.
FAQs
- Can I freeze the ham? Yes, you can freeze the ham for up to 3 months. Simply wrap it tightly in plastic wrap or aluminum foil and store it in the freezer.
- Is the recipe gluten-free? Yes, the recipe is gluten-free, but make sure to check the ingredients of the ham and the glaze to ensure that they are gluten-free.
- Can I double the recipe? Yes, you can double the recipe, but make sure to adjust the cooking time accordingly. A larger ham may take longer to cook, so use a meat thermometer to ensure that it reaches a safe internal temperature.
Conclusion
Baked ham with pineapple glaze is a classic recipe that’s sure to become a staple in your kitchen. With its sweet and tangy flavor, tender and juicy texture, and impressive presentation, it’s the perfect dish for special occasions or everyday meals. Whether you’re a seasoned cook or a beginner, this recipe is easy to make and requires minimal ingredients and effort. So go ahead, give it a try, and enjoy the delicious flavors and aromas of this amazing dish!