Olive Garden Breadsticks
Introduction
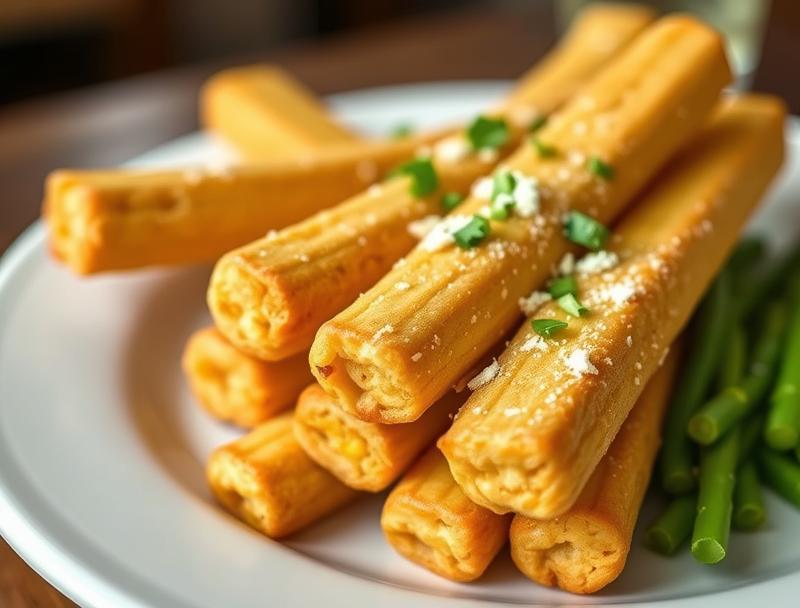
Imagine sinking your teeth into a warm, crispy, and flavorful breadstick, reminiscent of those served at Olive Garden. The good news is that you can easily recreate this Italian-American favorite in the comfort of your own home using everyday ingredients. This recipe for Olive Garden Breadsticks is not only delicious but also incredibly easy to make, requiring minimal effort for a dish that’s sure to impress. Whether you’re a fan of Olive Garden or just looking for a tasty snack or side dish, this recipe is perfect for you. With its perfect balance of crunch and softness, paired with a savory flavor that will leave you wanting more, these breadsticks are sure to become a staple in your household.
Why This Works
- Flavor balance and ingredient accessibility: The secret to these breadsticks lies in their simple yet flavorful ingredients, which are easily accessible in most supermarkets. The combination of butter, garlic, and parmesan cheese creates a savory taste that complements the bread perfectly.
- Ease of preparation: One of the best things about this recipe is how easy it is to prepare. With just a few ingredients and simple steps, you can have freshly baked breadsticks on your table in no time.
- Impressive results with minimal effort: Despite the simplicity of the recipe, the end result is incredibly impressive. These breadsticks are perfect for serving at parties, gatherings, or even just a quiet night in with the family.
Ingredients
- 2 cups of warm water
- 2 teaspoons of sugar
- 1 tablespoon of active dry yeast
- 3 1/2 cups of all-purpose flour
- 1 teaspoon of salt
- 1/4 cup of butter, melted
- 1/2 cup of grated parmesan cheese
- 1 clove of garlic, minced
- 1 egg, beaten (for egg wash)
- Sesame seeds or parmesan cheese for topping (optional)
Instructions
- Step 1: Begin by activating the yeast. In a large bowl, combine the warm water, sugar, and yeast. Let it sit for about 5-10 minutes until the mixture becomes frothy.
- Step 2: Add the flour, salt, and melted butter to the bowl. Mix until a dough forms. Knead the dough for about 10 minutes until it becomes smooth and elastic.
- Step 3: Place the dough in a greased bowl, cover it with a damp cloth, and let it rise in a warm place for about 1 hour, or until it has doubled in size.
- Step 4: Preheat your oven to 400°F (200°C). Line two baking sheets with parchment paper. Divide the dough into 12-15 equal pieces. Roll each piece into a long, thin rope. Place the breadsticks on the prepared baking sheets, leaving about 1 inch of space between each breadstick.
- Step 5: Brush the tops of the breadsticks with the beaten egg for a golden glaze. Sprinkle with parmesan cheese and minced garlic. If desired, top with sesame seeds or additional parmesan cheese.
- Step 6: Bake the breadsticks for 12-15 minutes, or until they are golden brown. Remove them from the oven and let them cool on a wire rack for a few minutes before serving.
Handy Tips
- To ensure your breadsticks turn out crispy on the outside and soft on the inside, make sure not to overmix the dough and keep an eye on them while they’re baking.
- If you want an extra crispy crust, you can try baking the breadsticks for an additional 2-3 minutes. However, be careful not to overcook them.
- For an extra flavorful breadstick, you can brush them with garlic butter before baking. Simply mix softened butter with minced garlic and brush it onto the breadsticks before sprinkling with parmesan cheese.
Heat Control
When baking the breadsticks, it’s crucial to keep an eye on the temperature and timing. The ideal temperature for baking breadsticks is 400°F (200°C). They should be baked for 12-15 minutes, or until they are golden brown. To check for doneness, look for a golden brown color and a crispy exterior. You can also check by tapping on the breadstick; it should sound hollow.
Crunch Factor
To achieve the perfect crunch factor, make sure your breadsticks are baked until they are golden brown and crispy on the outside. This can be achieved by not overcrowding the baking sheet, allowing for even air circulation around each breadstick. Additionally, brushing the breadsticks with egg wash before baking helps to create a golden, crispy crust.
Pro Kitchen Tricks
- For an easier cleanup, line your baking sheets with parchment paper before placing the breadsticks on them.
- To make the breadsticks more evenly sized, use a kitchen scale to divide the dough into equal pieces.
- If you’re short on time, you can prepare the dough ahead of time and let it rise in the refrigerator overnight. Simply let it come to room temperature before shaping and baking.
Storage Tips
- Leftover breadsticks can be stored in an airtight container at room temperature for up to 2 days.
- For longer storage, you can freeze the breadsticks for up to 2 months. Simply place them in a freezer-safe bag or container and thaw at room temperature when ready to serve.
- To reheat frozen breadsticks, simply bake them in the oven at 350°F (180°C) for 5-7 minutes, or until crispy and warm.
Gift Packaging Ideas
If you’re looking to give these breadsticks as a gift, consider packaging them in a decorative tin or basket. You can also wrap them individually in plastic wrap or aluminum foil and place them in a gift bag. Add a personal touch by including a jar of marinara sauce or a block of parmesan cheese. This makes for a thoughtful and delicious gift that’s sure to be appreciated.
Flavor Variations
- Different spices: Try adding some dried herbs like oregano, basil, or thyme to the dough for an extra burst of flavor.
- Creative toppings: Experiment with different toppings like sesame seeds, poppy seeds, or grated cheese for a unique flavor and texture.
- Ingredient swaps: For a gluten-free version, try substituting the all-purpose flour with a gluten-free flour blend. You can also use different types of cheese, like mozzarella or feta, for a varied flavor profile.
Troubleshooting
- Texture problems: If your breadsticks turn out too dense, it may be due to overmixing the dough. Try to mix the ingredients just until they come together, then let the dough rest.
- Ingredient replacements: If you’re missing an ingredient, try substituting it with something similar. For example, you can use garlic powder instead of minced garlic.
- Over/undercooking signs: Keep an eye on your breadsticks while they’re baking. If they’re not golden brown after 12-15 minutes, they may need a few more minutes in the oven. Conversely, if they’re too brown, they may be overcooked.
FAQs
- Can I freeze the dough instead of the baked breadsticks? Yes, you can freeze the dough for up to 2 months. Simply thaw it at room temperature when ready to shape and bake.
- Is this recipe gluten-free? No, this recipe uses all-purpose flour and is not gluten-free. However, you can try substituting the flour with a gluten-free flour blend for a gluten-free version.
- Can I double the recipe? Yes, you can easily double or triple this recipe to make more breadsticks. Just keep in mind that you may need to adjust the baking time slightly.
Conclusion
Making Olive Garden Breadsticks at home is easier than you think, and with this recipe, you’ll be enjoying delicious, crispy breadsticks in no time. Don’t be afraid to experiment with different flavors and toppings to make the recipe your own. Whether you’re serving them as a side dish, snack, or gift, these breadsticks are sure to be a hit. So go ahead, give this recipe a try, and indulge in the crispy, cheesy goodness of homemade Olive Garden Breadsticks.